But there are some problems when you:
1. When you want to edit them in Windows Movie Maker or some other edit software
2. When you want to put them into your portable media players, such as iPod, iPhone, Zune, Creative Zen and so on
3. When you want to watch them on some HD video players, such as Xbox, PS3, Apple TV and so on.
4. When you want to share your videos with your friends on youtube, myspace and other online video website.
All the problems' reason is the video format, MTS.
The video format of your HD Camcorder is MTS, and it is not supported by almost any video editing software, PMP, HD video Player and youtube.
So you have to convert it to common video formats.
Tip 1: Some knowledge about MTS, M2TS, TS
MTS format is a high-definition MPEG, AVC, H.264 transport stream video file format which commonly used by HD camcorders such as Sony, Canon, Panasonic, JVC. etc.
.MTS files are used primarily with Sony hardware. Camcorders make use of MTS in the form of AVCHD, a format for recording and playback of high definition video.
M2TS is a Sony high definition video file type. M2TS files are raw AVCHD videos recorded using Sony's camcorders, such as the HDR-SR(xx)series models. Panasonic, Canon and other brands of AVCHD camcorders also record in M2TS format.
TS (Transport Stream) is a communications portocol for audio, video, and data. It is a type of digital continer format that encapsulates packetized elementary streams and other data.
Tip 2: How to solve the 4 problem above.
It is easy to imagine that i met those problems when i got my first HD Camcorder. But now it is really easy for me to solve those problems.
The most important thing is convert your MTS file to other video files.
And here i recommend you Aiseesoft MTS Converter
The following is a simple guide for you:
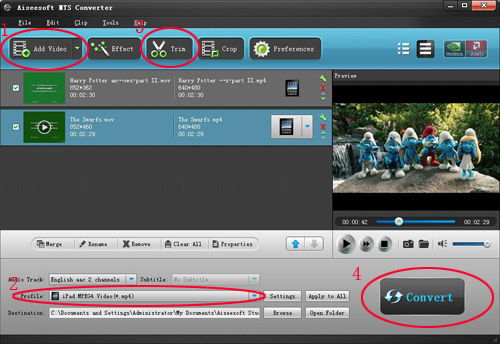
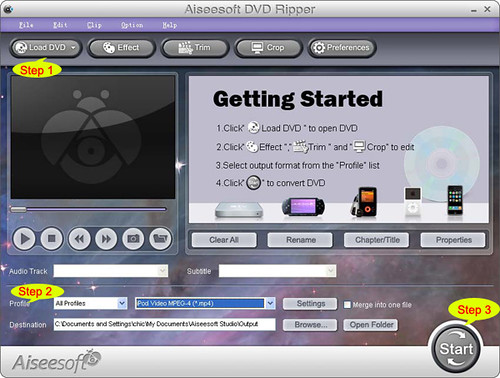
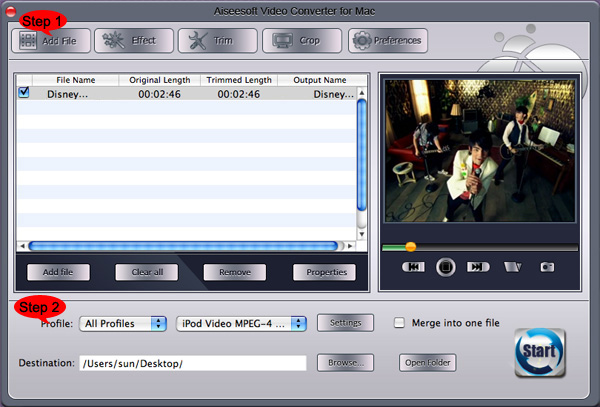
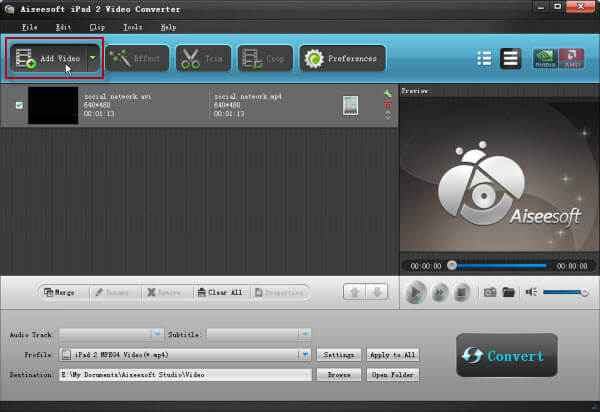
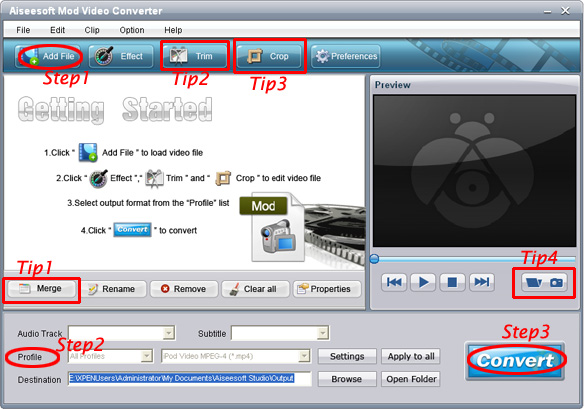
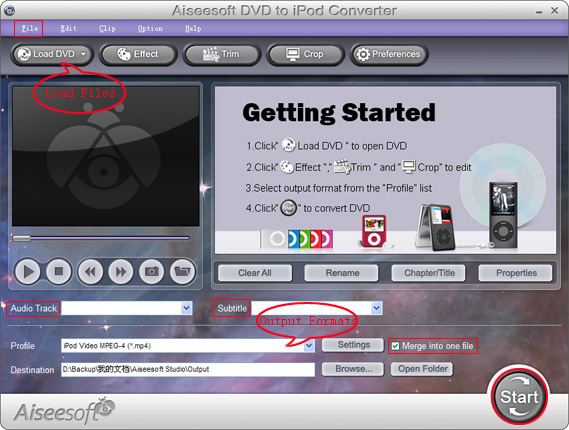
Step 1: Load Video
Click “Add File” to load the video that you want to convert to Aiseesoft MTS Converter.
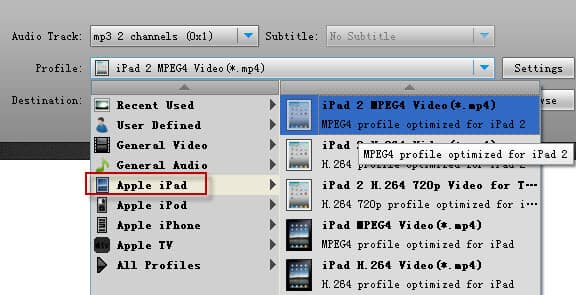
Step 2: Choose Your Output Profile and Settings
From “Profile” drop-down list you can choose your output profile according to your need.
For example, if you have a iPod and you want to convert video for it, you need to choose “iPod” from the profile list and then it also provides the second chance to specify your iPod generation.
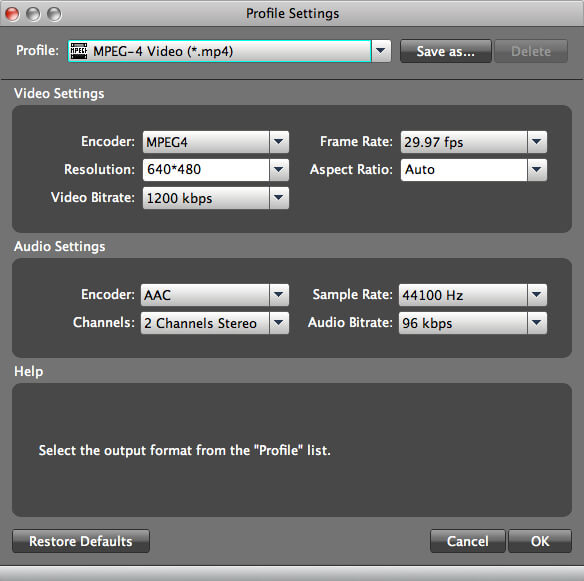
You can also click “setteing”adjust the settings of your output video, such as “video/audio encoder”, “Video/audio Bitrate”, “Channels”, “Resolution” and so on..
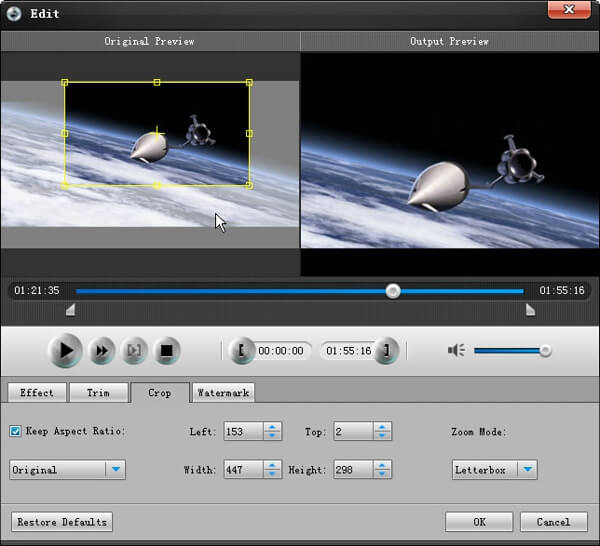
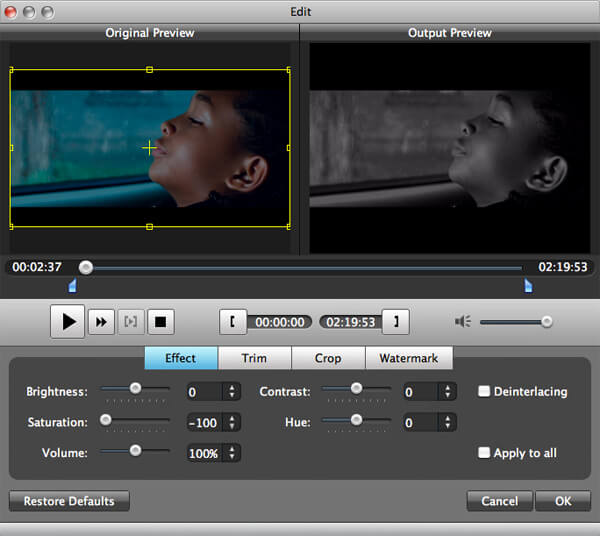
Step 3: Video Editing
This powerful MTS Converter allows you to do many video editings.
1. Click "Effect" to make special effect for your movie.
You can adjust the “Brightness”, “Contrast”, “Saturation” and also you can use “deinterlacing” to improve you output effect.
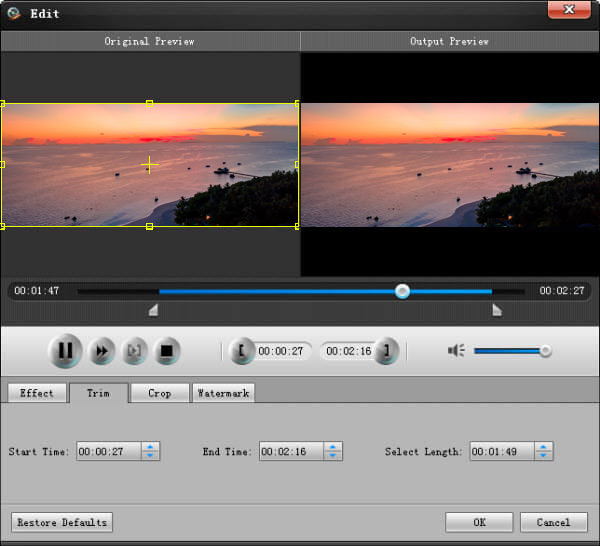
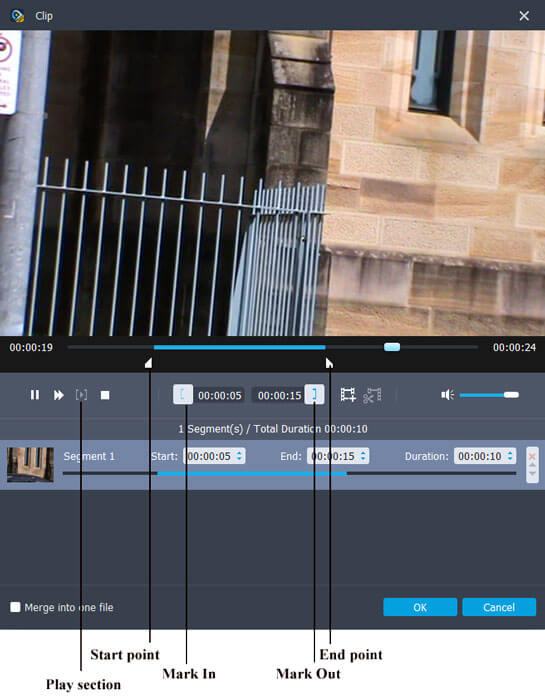
2. Trim:
“Trim” function allows you to pick up any part of your video to convert. You can just convert a part of your video that you want.
3: Crop:
Cut off the black edges of the original movie video and watch in full screen on your iPod using the "Crop" function.
Step 4: Conversion
After you have done all the steps above you can click “Start” button to start your conversion.
Tip 3:
If you want to know more about TS, you can have a look Aiseesoft TS Video Converter