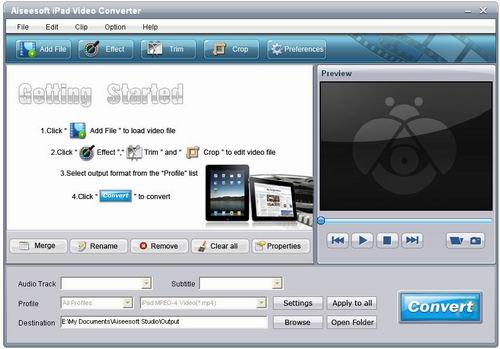
First download Aiseesoft iPad Video Converter, and install it. Then run the software. You will see the main interface as below.
Before converting videos, you can click the “Preferences” button. And you will come to this interface.
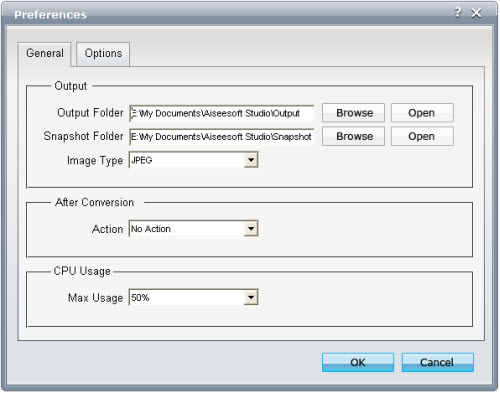
As you can see, you can set and change the output folder and snapshot folder by clicking the “Browse” button. Also you are allowed to choose the default format to save the image. Moreover, you can decide what the software do after conversion and the CPU usage rate. All these settings can be saved for later use.
Step 1: Add files
Before converting, you must add the MTS file needs converting by clicking the “Add File” button.
Step 2: Choose profile, destination and settings
This MTS to iPad Converter allows you to select your preferred audio track and subtitle for the output video. Then choose the output format by clicking the Profile drop-down button. Click “Browse” button to choose the destination file to place the output file.

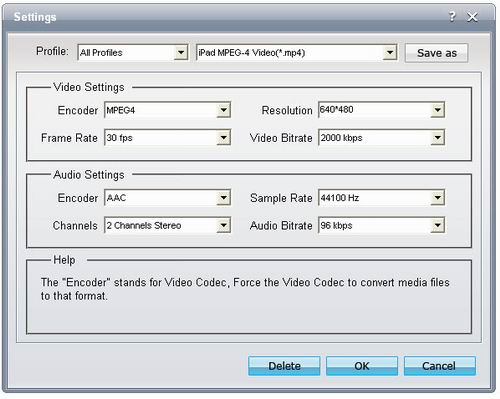
If you need to adjust some further settings, such as setting Video Encoder, Resolution, Audio Sample Rate, Bitrate…, you can click the “Settings” button to go to the operator interface.
Step 3: Start MTS to iPad conversion
没有评论:
发表评论